Quick Setup Guide
Welcome to Asveora's Quick Setup Guide, a stream-lined set of instructions for setting up an Asveora User ID and joining into Asveora's network. Please be sure to read all steps thoroughly and if you come across a concept that you do not understand, refer to the standard setup guide which is a far more comprehensive overview.
S1: The Constitution
Read the entire Constitution of Asveora which can be found here. Read it carefully as you are responsible for your agreement to it upon joining Asveora.
S2: Acquire an Image
In order to create an avatar, you first need an image. This can be changed at anytime later. If you are looking for a default selection to get started with, see Pixabay.
S3: Colors Selection
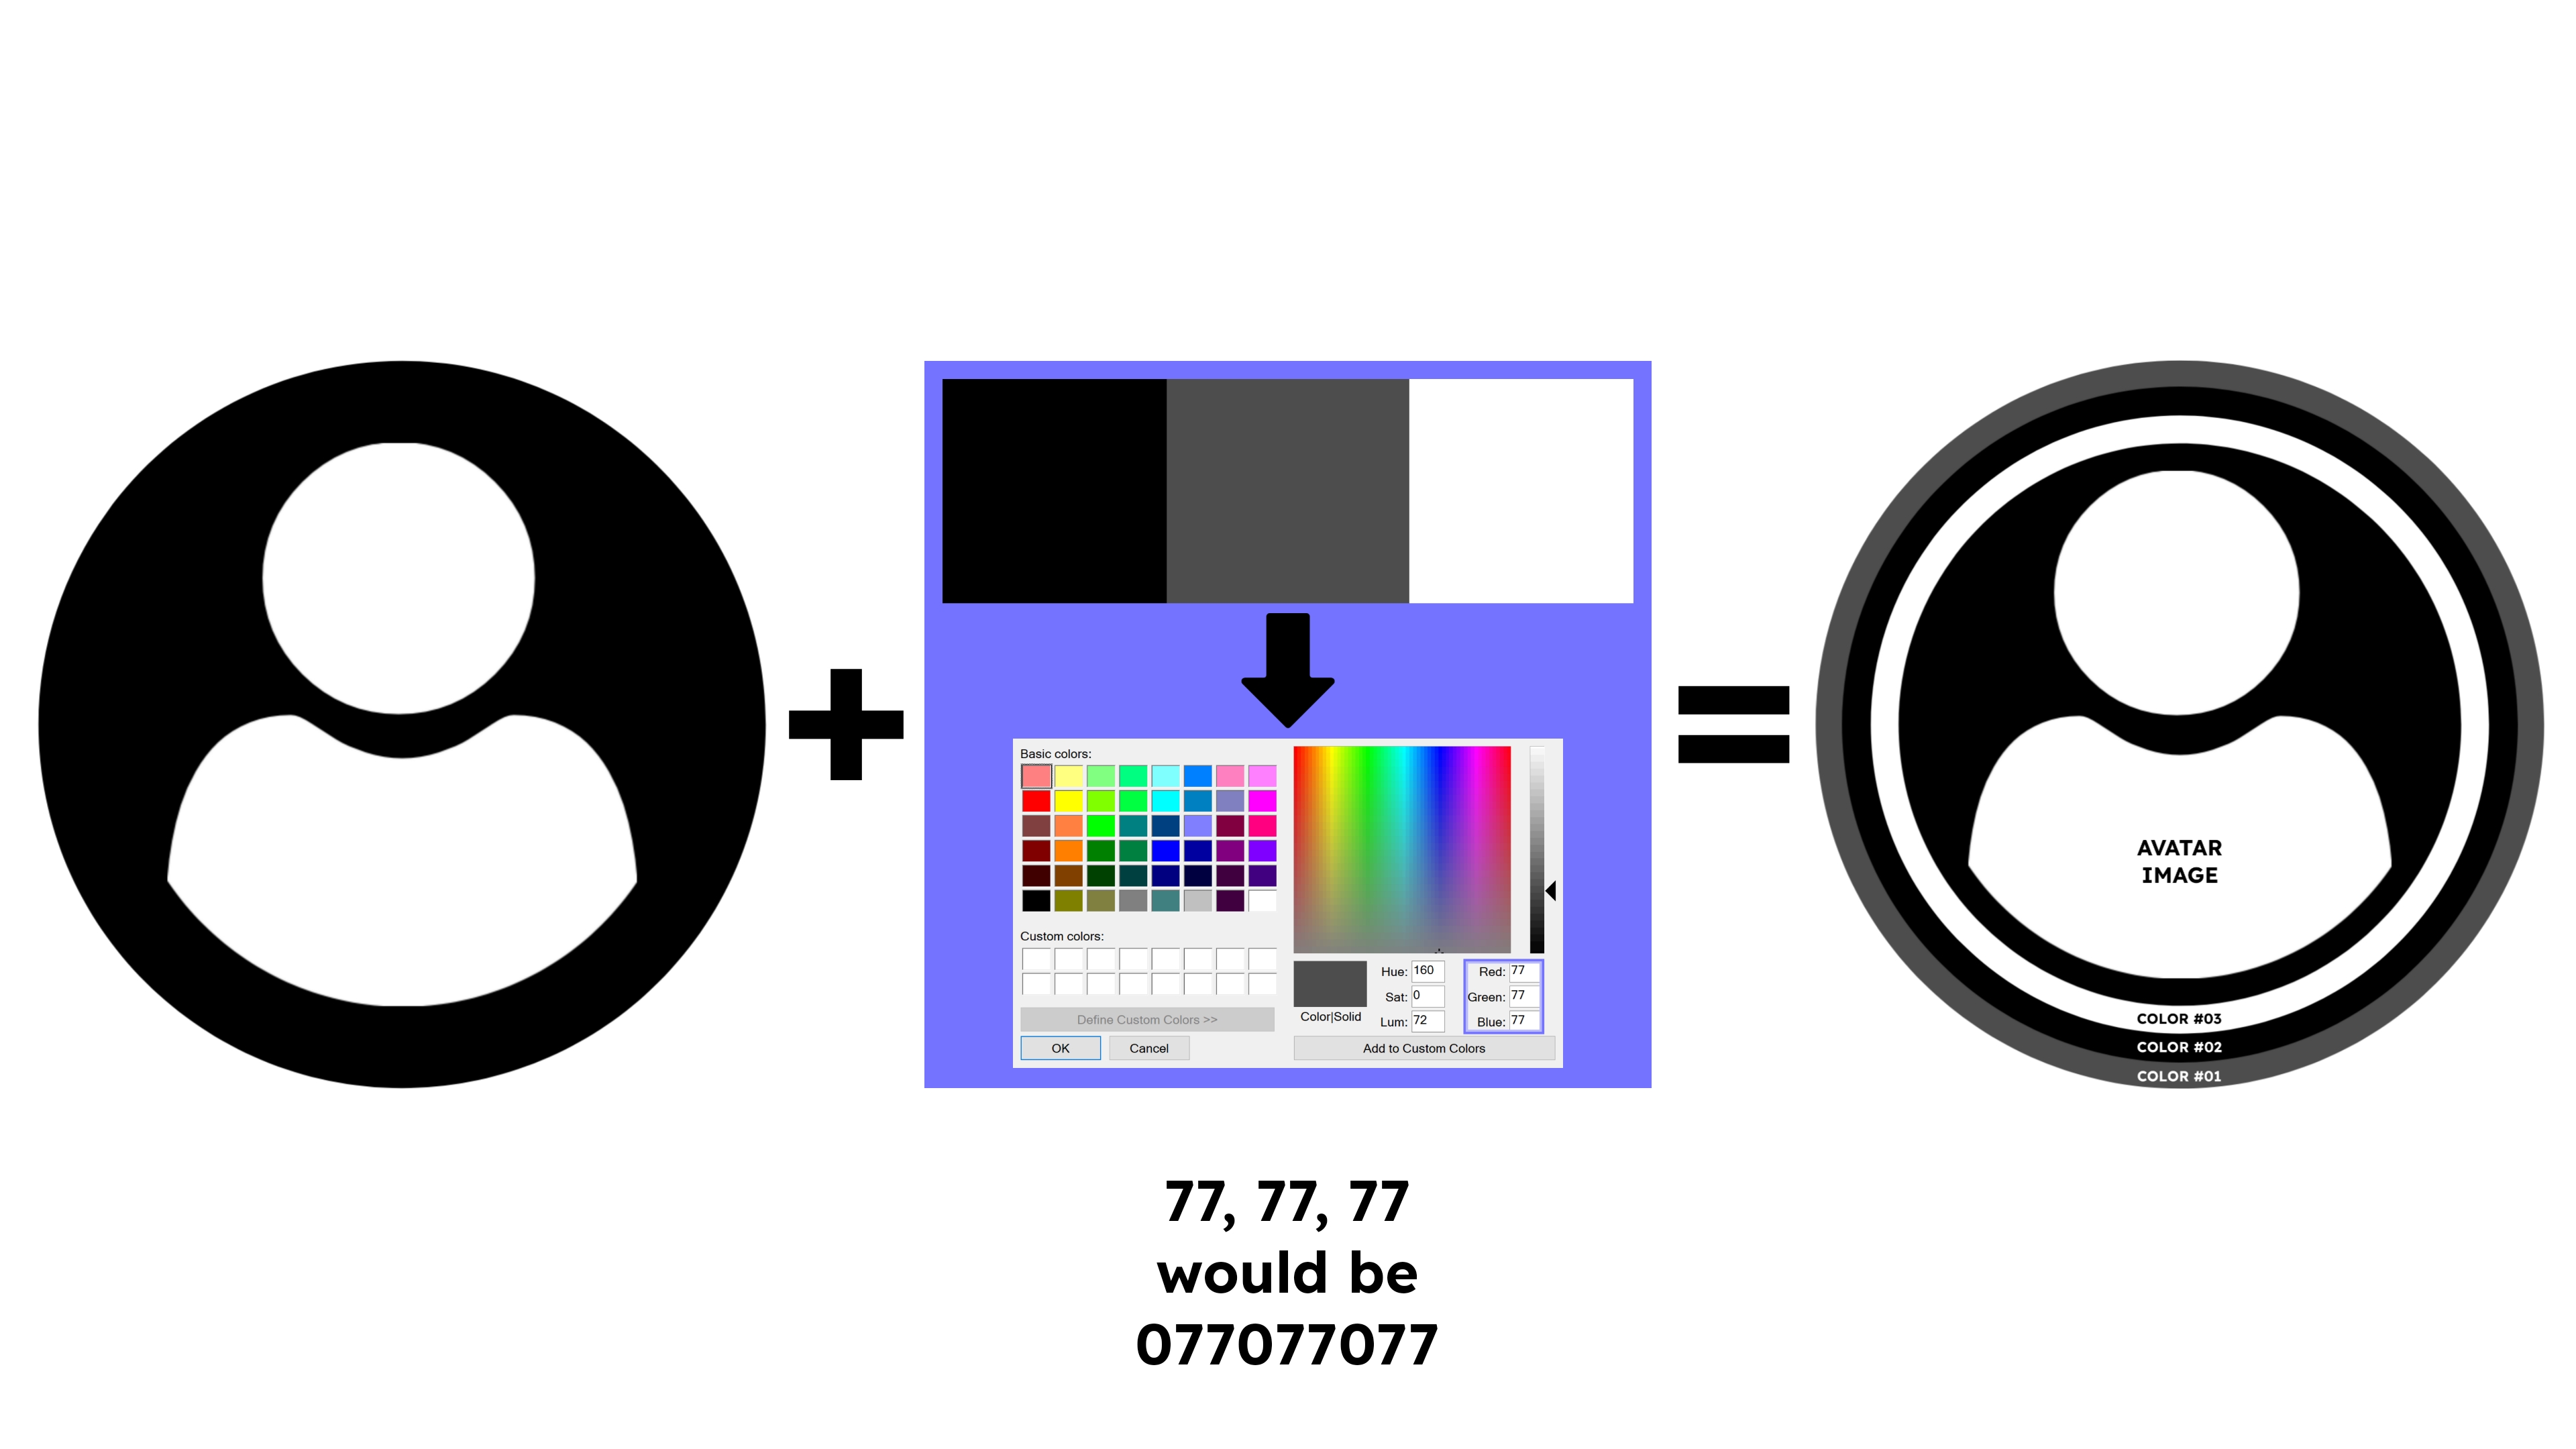
Now pick three colors and obtain their RGB values. This can easily be done here at HTML Colors. Greyscale colors such as shades of white, black, and grey are also accepted. Once you have the RGB values for each color, save them in a text file or write them down. This is the second part of your Asveora Profile Code (APC).
S4: Character String
Generate a unique string of 12 characters that are all lowercase letters and numbers. This can be done with various tools, but one we recommend is RANDOM.ORG's string generator. Some of the values of a string can be altered to make it more personal, but remember, keep it structurally random so it contains no readable words. This is the first part of your APC.
S5: Join a Wheelcore
In order to find a wheelcore to join, go here, select a landhub and then navigate to the "User Groups" index of the landhub. There you will find a list of wheelcores. Find one that fits your needs, contact the administration of it, and get an Asveora Profile Address (APA) made. Alternatively you can make your own, but you will need to read the standard setup guide for instructions.
S6: Register to Matrix
Go here to find a matrix homeserver to join. Once you have done so, open any matrix client (we recommend Element), and sign up for a homeserver, using the 12 character string as your matrix username, that you generated in step four. Set up your matrix account and turn off the "Identity Server" option under general settings. Then, make sure to also setup your security keys and phrases under the security settings. It's extremely crucial to keep record of these.
S7: Build Your Avatar
Use a graphics editing tool such as Photopea or one of your choice to create an Asveora Compatible Avatar (ACA) that displays your three chosen colors along with your avatar image. An avatar template is included in the Asveora Local Data Names download which provides you with the necessary local folders for storing data related to your Asveora Profile Space (APS).
To use it, simply download the ZIP file, extract its contents, go under the "assets" folder and then cut or copy out the folder labeled "username" which you can then rename to your Asveora Username (the one which shows up at the beginning of your APA). Under the "username" folder you will find the "Data" folder and under that you will find the "Avatar" folder which contains ACA template files.
The three colors must be visually well defined within the avatar and can be displayed in many ways (see here) ranging from banding lines to rings to palette groups to whatever you want. The ACA template uses the rings structure for avatars with the first color being the outer ring, the second color being the middle ring, and the third color being the inner ring, which is of course the one closest to the avatar's image.
S8: Assembling AUID
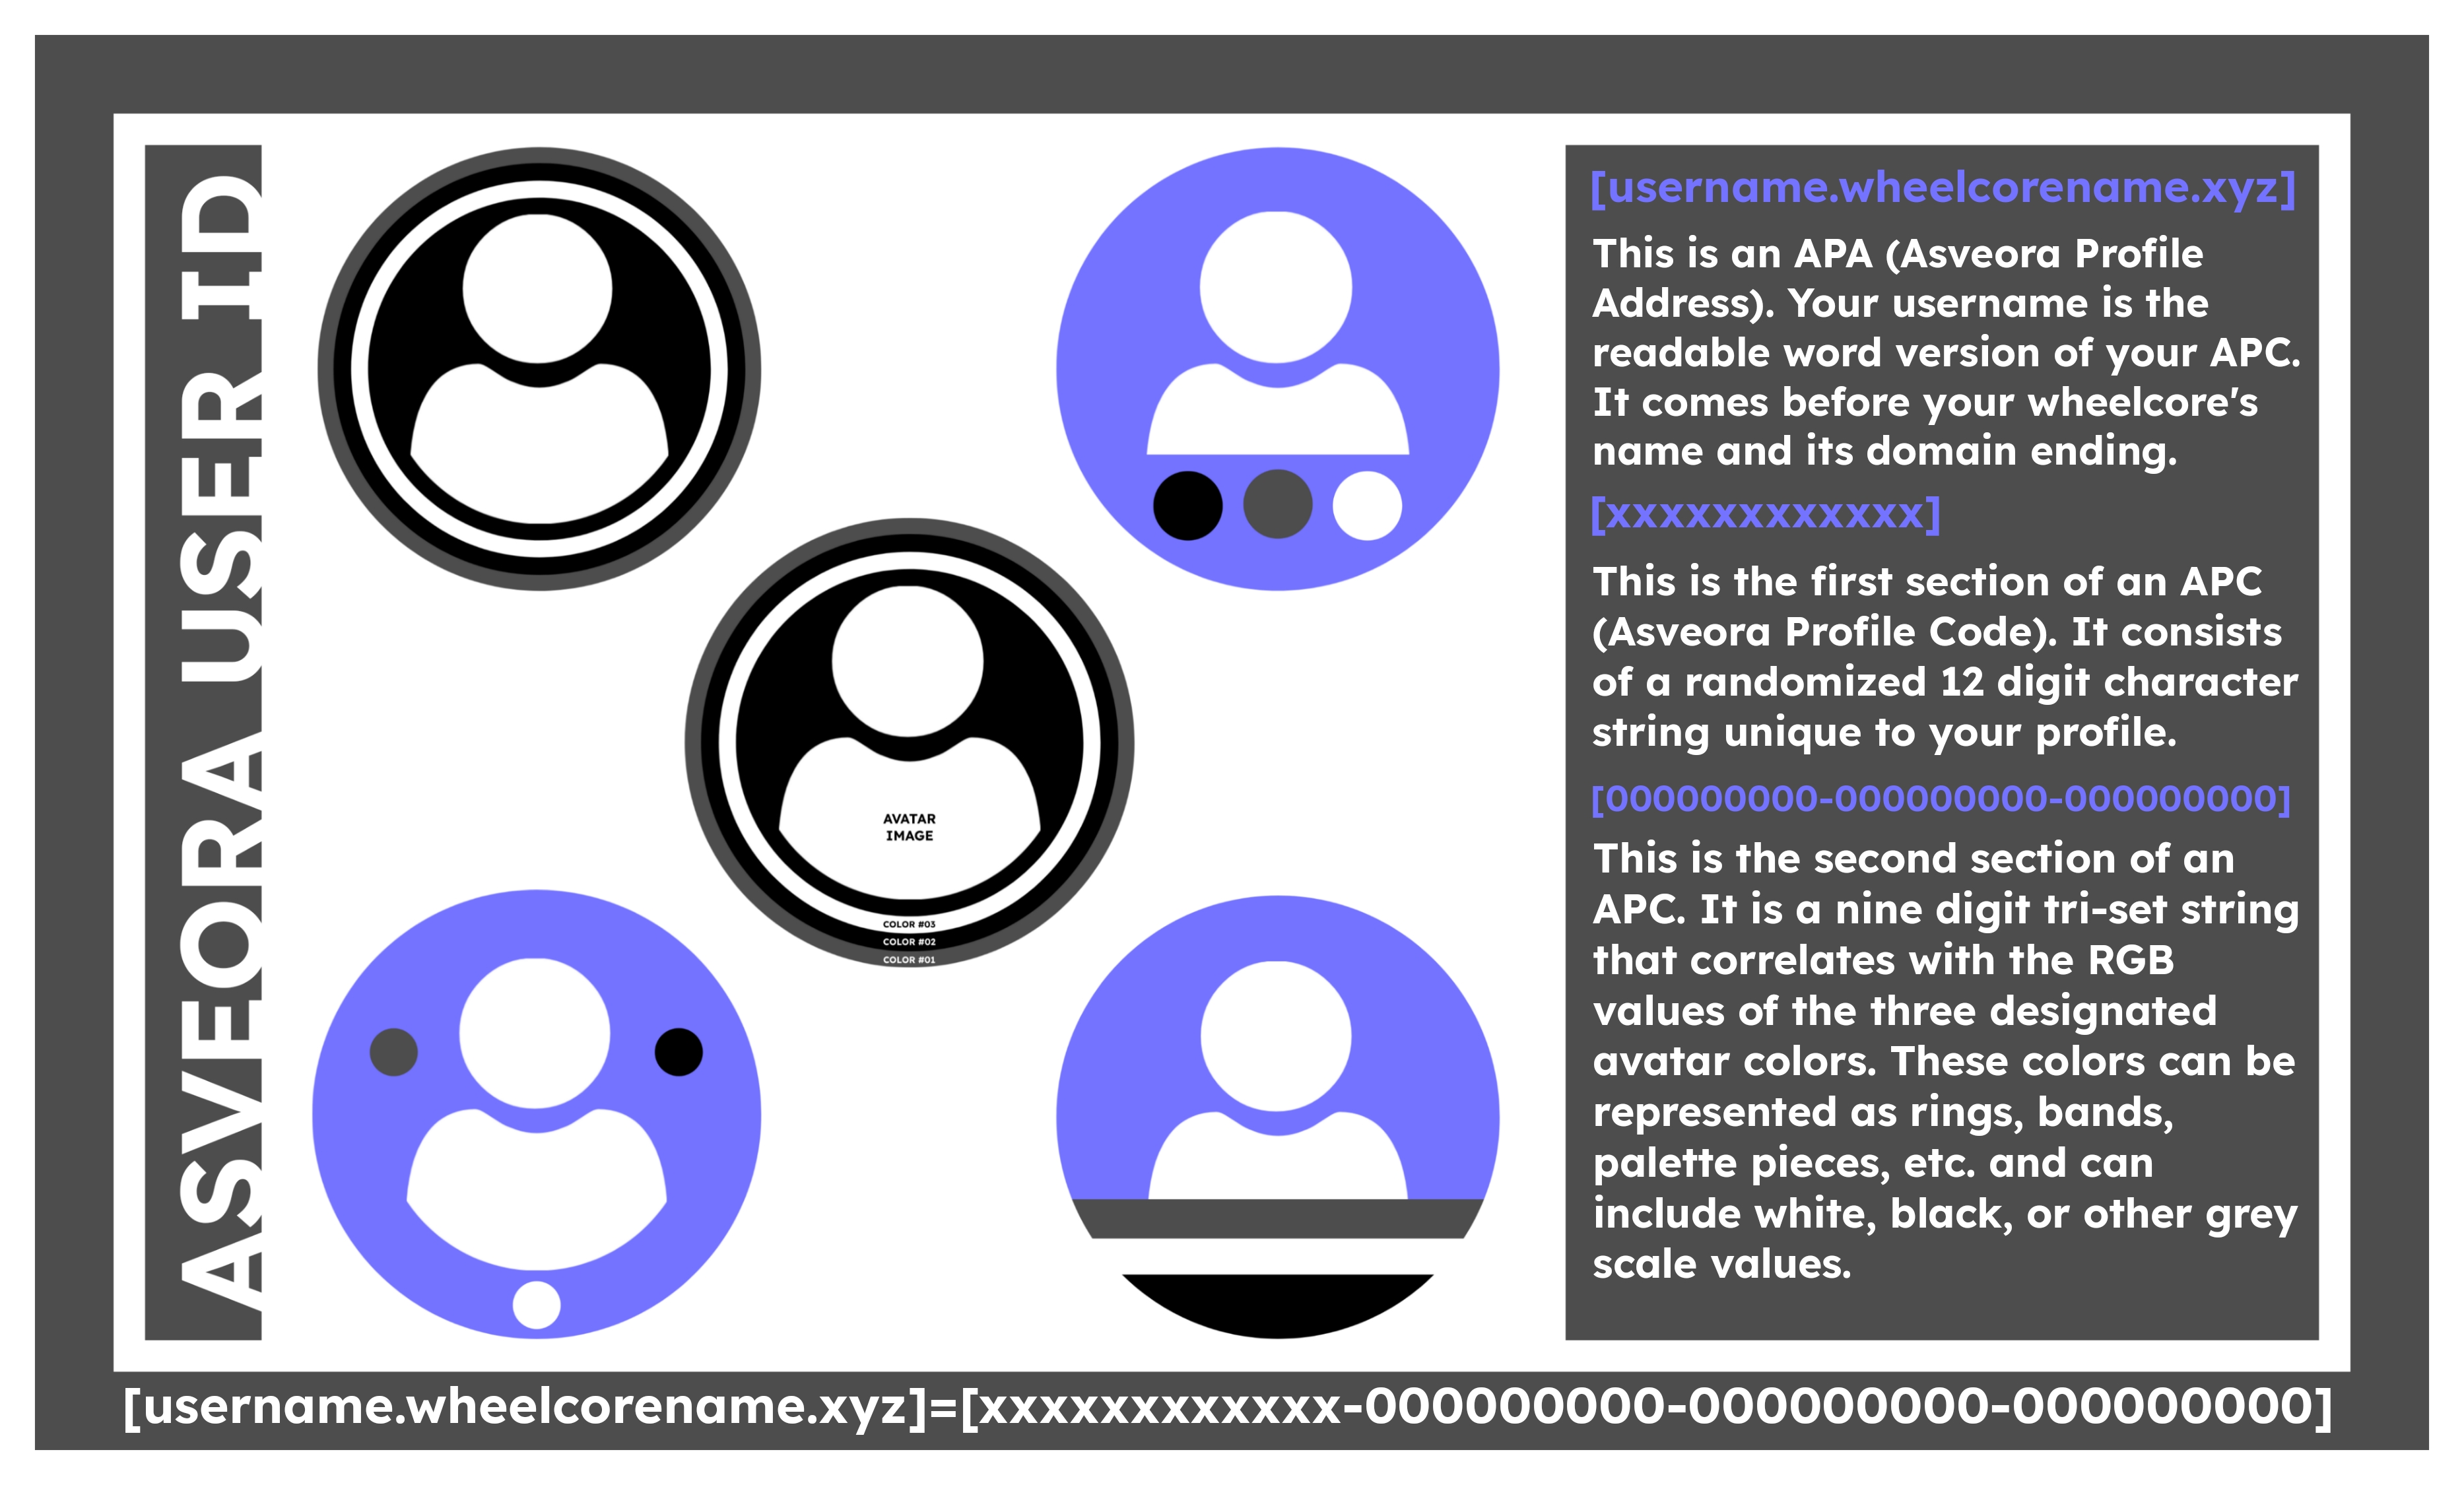
Now you have everything to assemble an Asveora User ID (AUID)! First is your APA (Asveora Profile Address) which you received from your chosen wheelcore. It should look like this:
username.wheelcorename.xyz
Next is your APC (Asveora Profile Code). The first half of it contains your 12 character string (represented by X's) and the second half of it contains your color codes (represented by 0's) as three nine-digit sets. It should look like this:
xxxxxxxxxxxx-000000000-000000000-000000000
Together your APA and APC make up your AUID. It should follow this format:
[username.wheelcorename.xyz]=[xxxxxxxxxxxx-000000000-000000000-000000000]
Now set your ACA as your the profile picture of your matrix account and message this account for verification. If you want to make sure that you have everything configured correctly, check the diagram that is provided below. Every part of your AUID can be changed at anytime but those changes do require re-authentication processes.
Please keep in mind that it can take up to 48 hours for the bot to see you upon joining for verification. Be sure to check the message below for the status of the bot.
Status: The bot is currently online.
RETURN